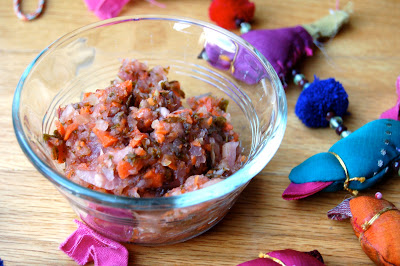
First and foremost - cultured vegetables. This has been the single-most important food I have incorporated into my diet since I was diagnosed several years ago. They are simple to make and a batch lasts about a month. The recipe I am sharing today was created by Rose, my mother (who we all know is a big part of why I am healthy today). She read a book called Body Ecology, that changed her life (and system)!
Before I get to the recipe, here are a few other healthy habits worth trying this New Year.
Raw Brownies
One of the benefits of cultured vegetables is the natural ability to control sweet cravings. Sugar is one of the biggest culprits of my flareups, and also one of my biggest weaknesses, or at least it used to be. After a year of cultured vegetables in my diet, I can honestly say, I do not really crave sweets anymore. However, when I need a little sweet treat, I turn to these Raw Chocolate Brownies (which contain no sugar). The sweetness comes from Medjool dates. I always have a little bag of these brownies in the freezer for a quick and easy sweet satisfaction.Habit #2 (Lemon-Cayenne cleanse)
I picked up this habit from the Food Babe, a healthy food blogger that is located in NC as well. She starts every morning with hot water, lemon and cayenne. This is a natural liver cleanse that eliminates toxins from the digestive tract. Considering my condition, I jumped on this habit right away and have been pleased with the outcome ever since. Thank you Food Babe!!If you can't quite stomach cayenne-lemon water, at least try Dandelion Tea (add a few drops of stevia for sweetness). I drink tea with lunch every day instead of water to help break down the food. I only drink water before and after meals, never during. This helps keeps bloating down and eases digestion.
Ways to Eat Cultured Vegetables
Back to cultured vegetables, which is a form of fermented food. Many people ask me why I eat fermented foods and I usually respond with "why not eat the most healing of foods?!?!"For starters, fermented foods have been around for centuries and now come in several forms: yogurt (plain), kefir, sauerkraut, kimchi and soaked grains. For this post, I am focusing on cultured vegetables (sauerkraut or kimchi), which are defined as "cut or shredded vegetables that are left in an airtight sanitary environment for several days or longer at room temperature" according to Body Ecology. This allows the enzymes on the vegetables to proliferate creating a mineral-rich food that aids digestion and eliminates toxins. They help fight yeast and other unhealthy pathogens in your intestines, which is great for controlling sugar cravings (see above). Finally, and most importantly, they are alkaline and very cleansing for the body.
First of all, NEVER heat cultured vegetables. It won't kill you or anything, it will just kill all of the digestive enzymes and good bacteria that you want. Other than just adding them to the side of any meal, here are a few other ways I like to eat them:
- with blue corn chips or other tortilla chips (the veggies act like a salsa)
- similarly, mix with avocado for a guaco-cultured-mole!
- over scrambled or fried eggs
- with cheese and crackers
- use some of the brine as a salad dressing. TONS of great nutrients in the dressing!
- spread on sandwiches in place of a condiment
Cultured Vegetables
Makes: Large container full
Prep Time: 30 minutes + 4 days
1 head of green cabbage
6-8 tomatillos, quartered
4 carrots, halved
1/2 onion, cut in large chunks
1 bunch kale, stems removed
2 jalapenos, seeds removed, halved
1/2 bunch cilantro
1/2 lemon, juiced
2 T salt
filtered water
Pull out all of the necessary equipment:
Very large mixing bowl
Large glass (or other air tight) container
Food processor (or high-powered blender)
Sharp knife
Large slotted spoon and wooden spoon
Spatula
Attach the shredding disc to the food processor if you have one. If not, chopping the vegetables works just as well.
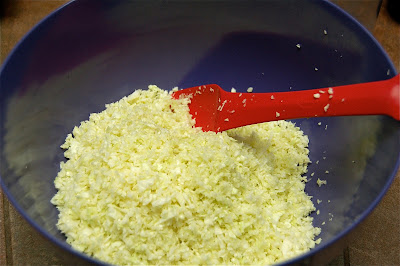
Start with the cabbage. Pull off 3 external leaves and set aside. DO NOT throw the leaves away since they will be the seal for the fermentation process. Cut the cabbage in quarters and remove the stem. Cut into small enough pieces to fit through the feeding tube of the food processor and shred. Transfer to the large bowl (this might require a few batches).
Then shred the carrots and add to the bowl.
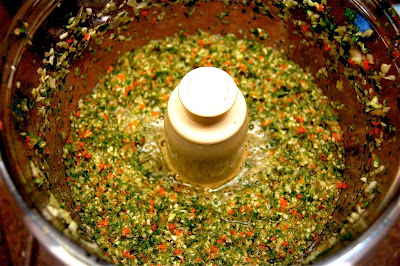
Now switch from the shredding disc to the chopping blade and chop the kale and cilantro. Add this to the bowl and continue with chopping the tomatillos and onion separately. Add this to the bowl and mix all together.
Put about 1/4 of the mixture back into the food processor with the chopping blade, along with the filtered water. Add the lemon and salt and process until well blended to create the brine. Pour the brine back into the very large bowl and mix well.
Using a large sturdy slotted spoon, start moving the mixture into the large glass jar or other air tight container, pushing the vegetables down every time you add more. Leave enough room at the top of the jar to add the whole cabbage leaves (folded in half). Pour in the remaining bring until just covering the vegetables, no more. Lay the cabbabe leaves on top of the vegetables and on top of the brine. With your fist or large wooden spoon. Push this all down and close the container.
Sit the container on the counter or pantry (any location that is out of direct sunlight) for 4 days to ferment. Small bubbles will start to form and climb up the sides of the jar. After 4 days, unseal, remove the cabbage leaves and place the mixture in the refrigerator for up to 2 months. If there is a lot of brine remaining, drain this, but don't discard. This serves great as a salad dressing and will keep in a container in the refrigerator for up to a month.
A Few Tips
- Use filtered water only for this. I usually just purchase a bottle of filtered water when I buy all of my veggies to ensure clean water.
- This is very easy to make with a food processor. If you do not own one, then prepare to do some chopping! At minimum, a blender is needed to create the brine.
- Wear an apron! This always makes a mess on the counter, mostly from all the little chopped vegetable pieces.
- Use very large bowls! It will make your life much easier when stirring the mixture. If you think you have a large bowl, go find a bigger one!
- Use an air tight container to make these. I like to use large glass containers with an air tight rubber seal.
- Try to buy all organic ingredients for this. Your body will thank you later!
- While the mixture ferments, place the container in a location that is NOT in the sunlight. A pantry or cabinet is a great spot, just set a reminder to stop the fermentation process after 4 days or they start to smell bad.
- Do not replace tomatillos with tomatoes. I tried it once and didn't like the taste that much. It also creates so much liquid that I had to interrupt the fermenting process and drain the veggies.


Wow, I love this blog, learned a lot!! I'm making this tomorrow- that sounds great and right up my alley!!
ReplyDeleteIt is delicious and great for you! Hip hip hooray for bacteria!
Delete